
前言
本文的目的是为了给将要制作的ESP32手环做技术储备
记录基于arduino的ESP32驱动TFT-LCD屏幕的配置过程,并且进一步使用LVGL这个GUI框架
硬件准备
ST7789 240x240 1.3寸 SPI接口LCD屏 16位色深RGB565
ESP-WROOM-32E开发板
ESP32的数据手册链接 https://download.csdn.net/download/weixin_42487906/21119656
软件准备
- Arduino 1.8.9
相关链接
LVGL移植到arduino的官方文档 https://docs.lvgl.io/7.11/get-started/arduino.html#get-the-lvgl-ardunio-library
TFT_eSPI github仓库 https://github.com/Bodmer/TFT_eSPI
相关博客 https://blog.csdn.net/weixin_44007534/article/details/113653031?spm=1001.2014.3001.5501
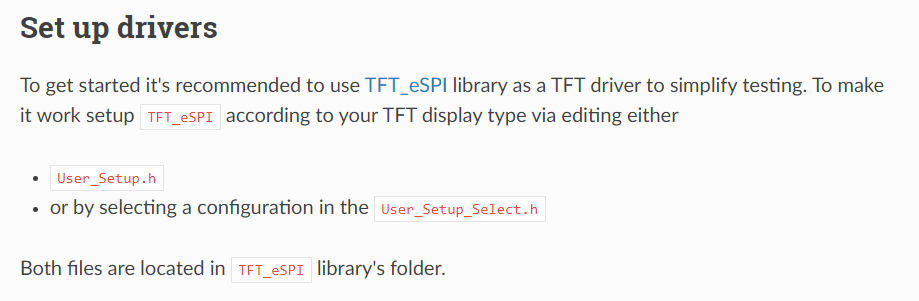
LVGL移植到arduino的官方文档里提到LVGL在arduino运行是基于TFT_eSPI库,所以我们先配置TFT_eSPI库
TFT_eSPI库配置
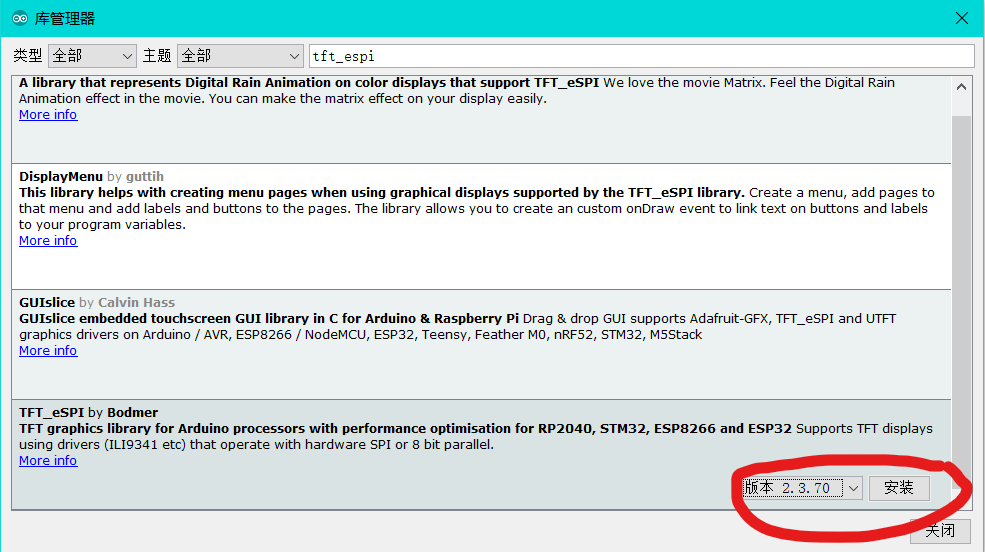
在库管理器下载TFT_eSPI库
安装好后不能直接用,需要针对自己使用的LCD来完成配置
安装好的库通常在 C:\Users\Alpha\Documents\Arduino\libraries Alpha是我的用户名
进入TFT_eSPI库文件夹,打开User_Setup_select.h
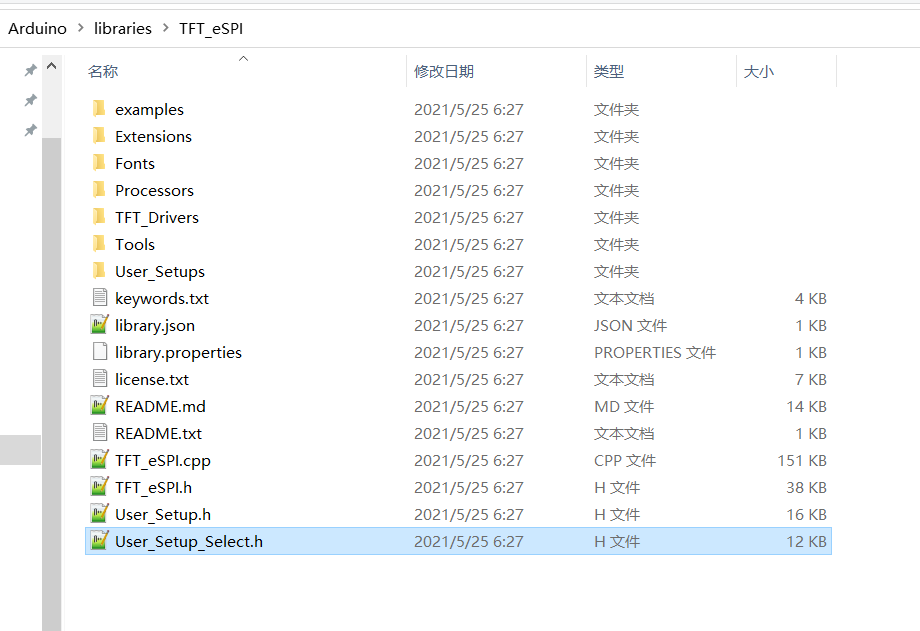
注释掉User_Setup.h头文件,同时找到适合自己屏幕的头文件,解开他的注释


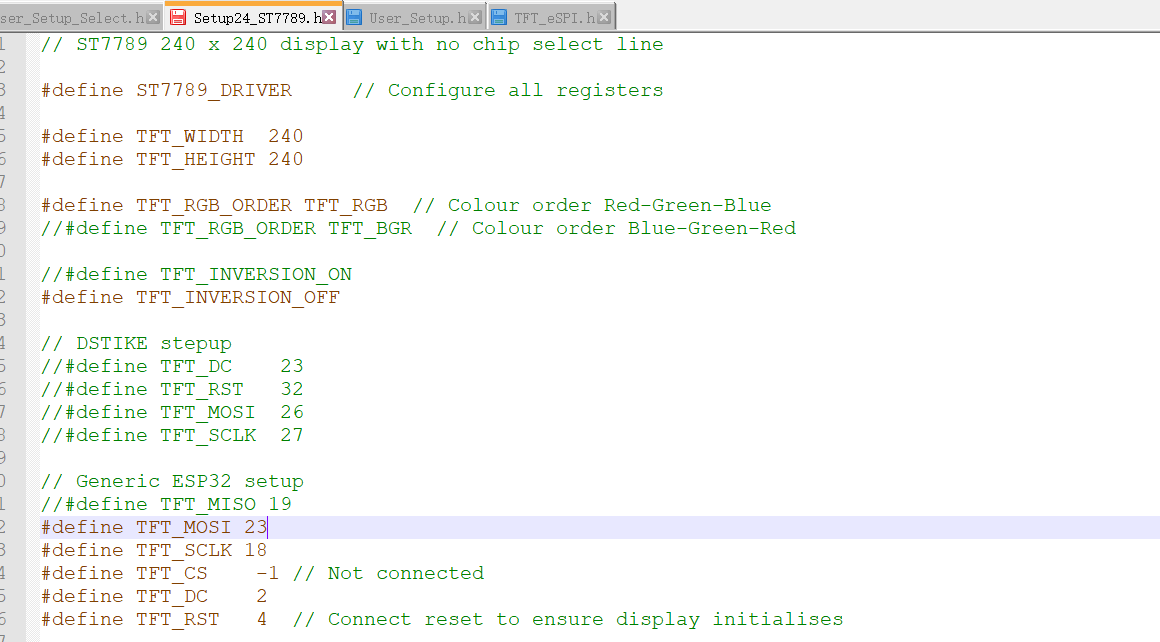
最终效果如下
1 | //#include <User_Setup.h> // Default setup is root library folder |
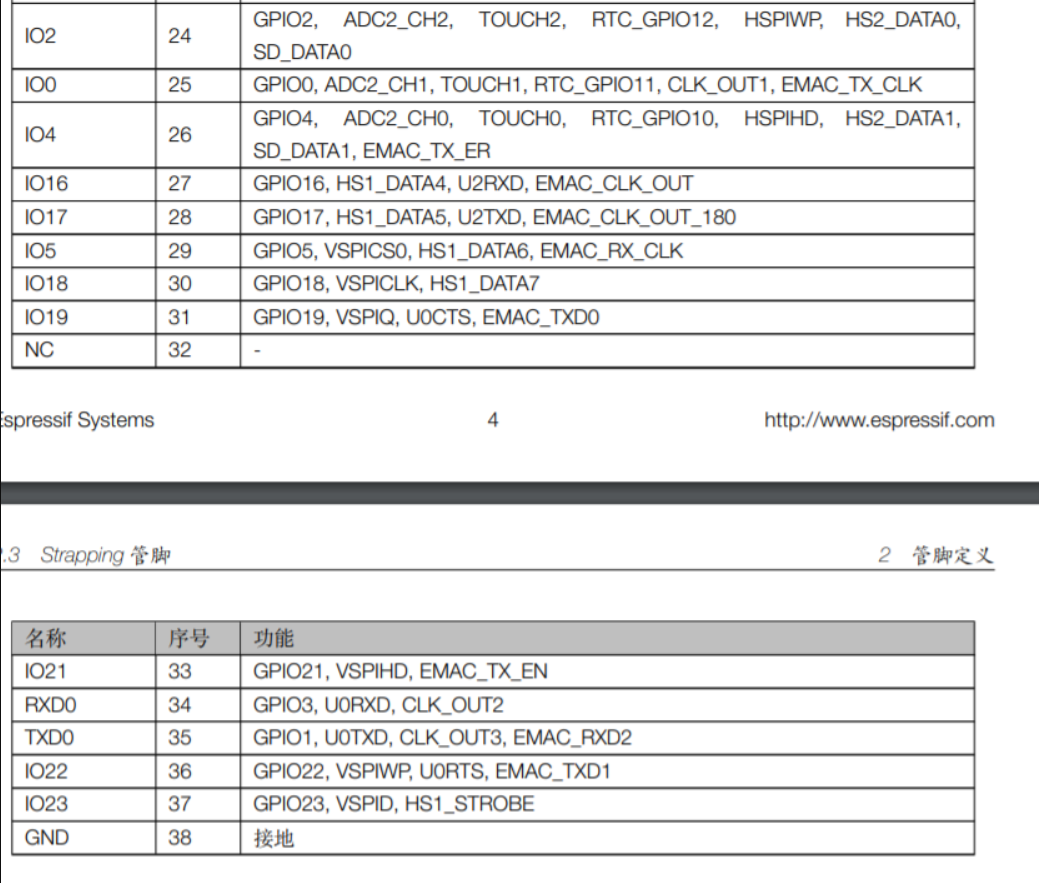
然后还要进到Setup24_ST7789.h,完成引脚更改。根据开发板的数据手册,MOSI设置为IO23引脚,也就是VSPID,SCLK设置为IO18引脚,也就是VSPICLK,其他脚接到一般的IO上就行,记得RST引脚一定记得接到板子的引脚上不能省,LCD的BLK背光控制引脚可以不用接悬空。剩下一些字库的配置暂时不管
完成硬件上的接线,除了MOSI,SCLK,DC,RST外还要接VCC,GND总共6条线
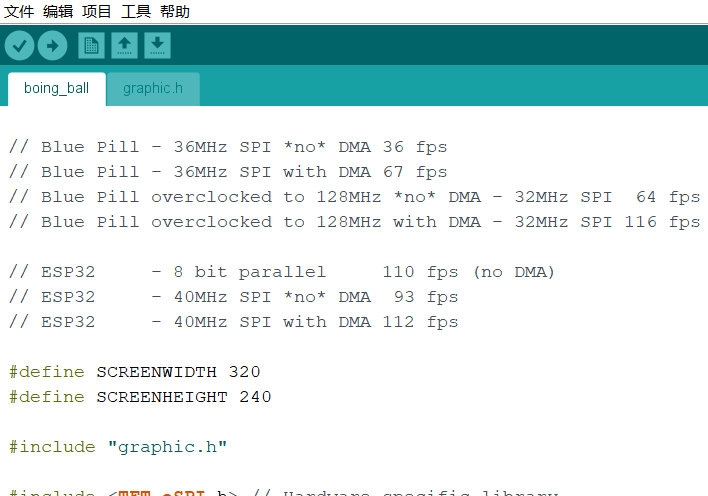
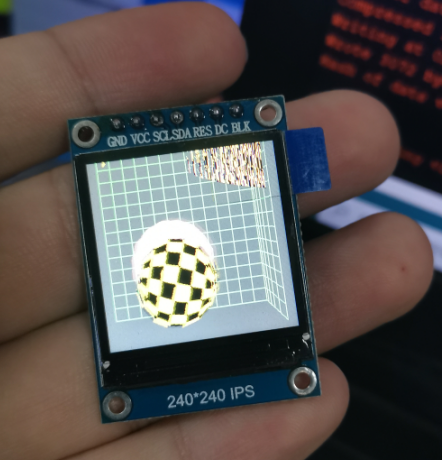
然后在tft_espi的示例代码中找到boing_ball示例程序,别的示例程序也可以,来做个测试,这个程序虽然是320*240的但是也能在我们的屏幕上用,编译下载观察现象
可以看到屏幕正常显示
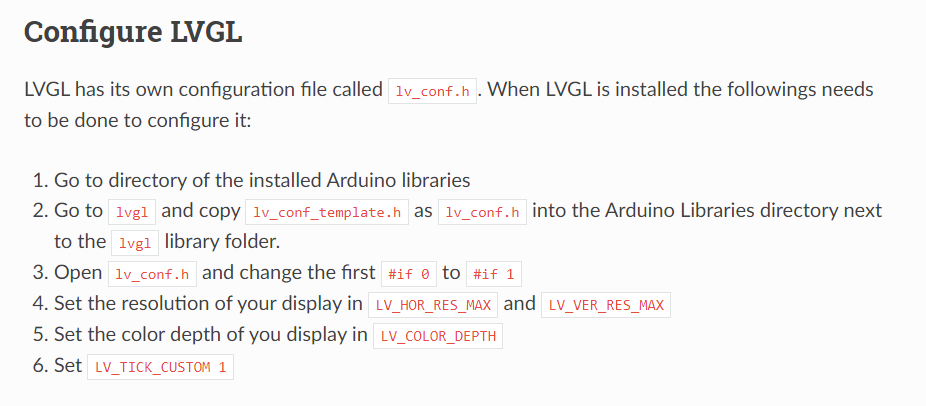
LVGL库配置
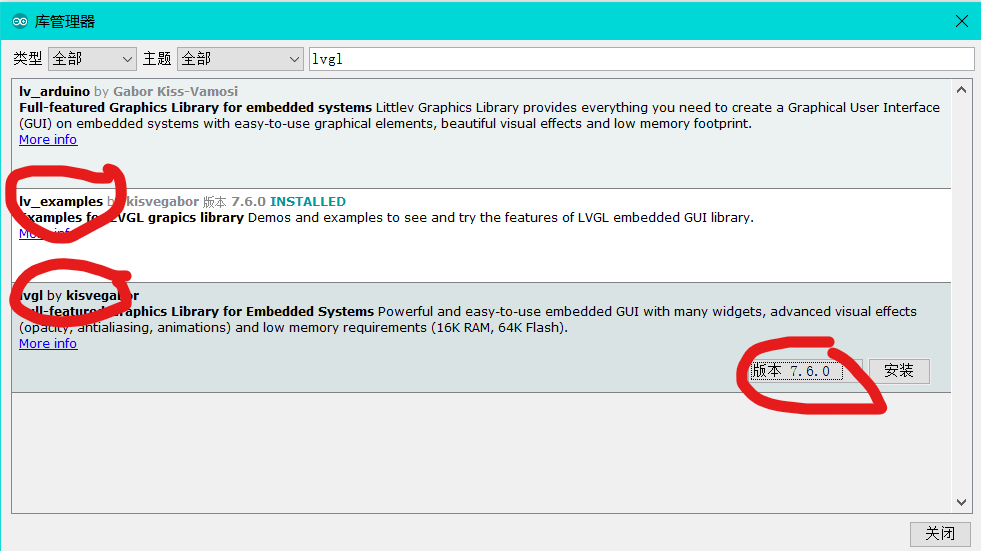
在库管理器中安装lvgl和lv_examples,保险起见我安装的是7.6.0版本
下面根据,LVGL移植到arduino的官方文档完成配置
步骤一
下图,官方文档让我们进到库所在文件夹里,把lv_conf_template.h从lvgl文件夹里拿出来放到与lvgl同级的文件夹里,并改名为lv_conf.h
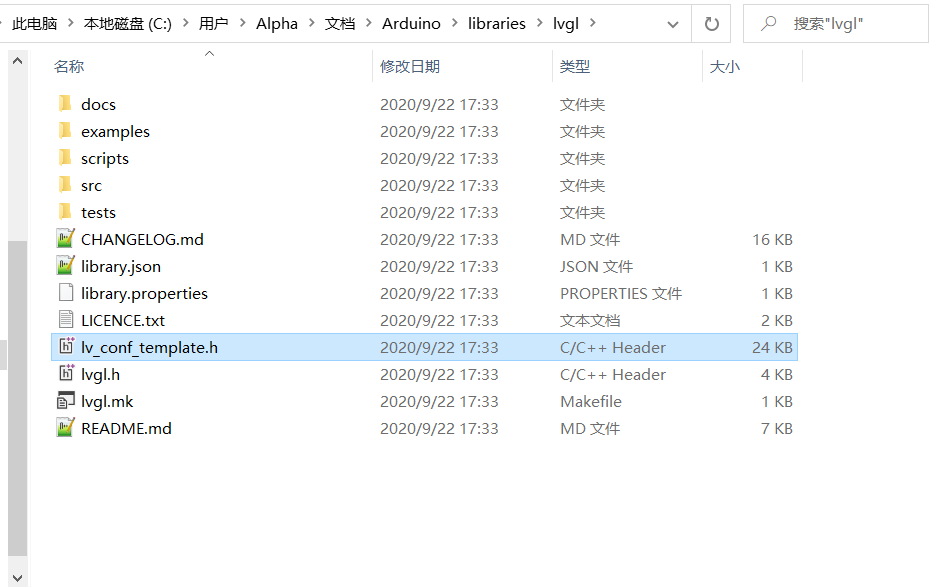
最终的效果如下图

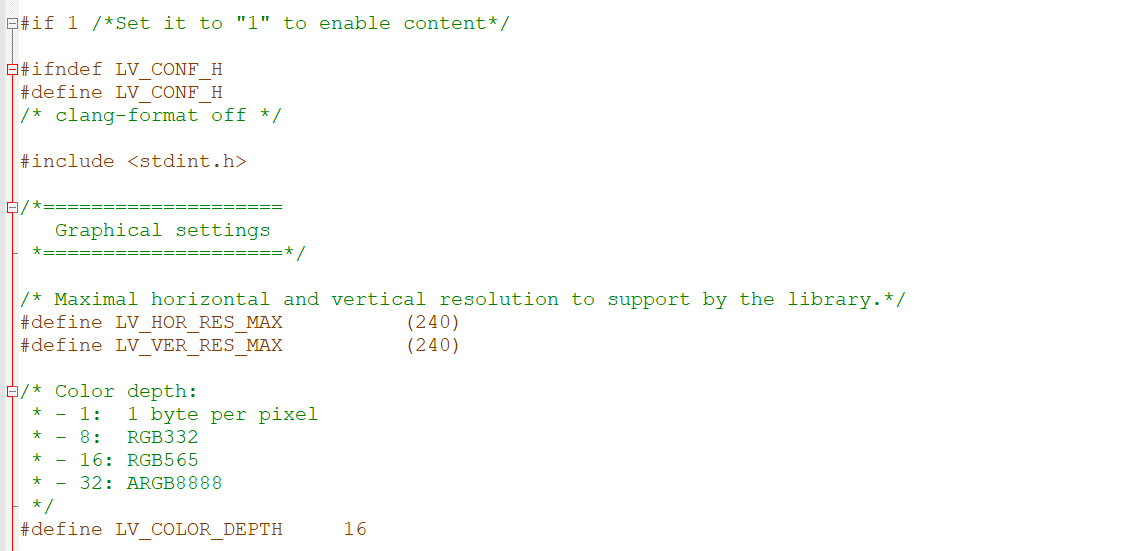
打开lv_conf.h,将LV_TICK_CUSTOM设为1

把分辨率和色深改成自己屏幕的,将最上面的#if 0改成#if 1
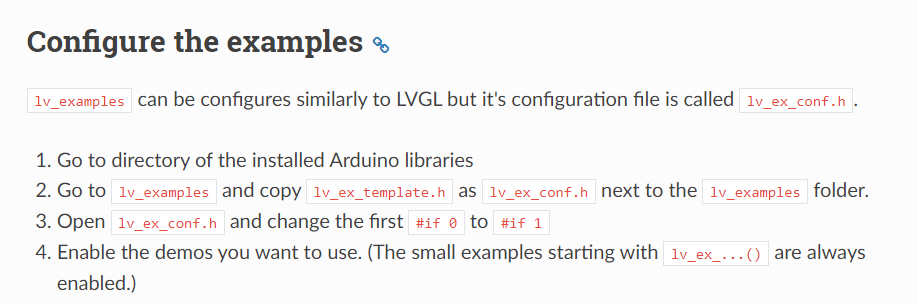
步骤二
将lv_examples文件夹中lv_ex_conf_template.h拿出来放到与lv_exmaples文件夹同级的文件夹中,也就是libraries文件夹中,并改名为lv_ex_conf.h
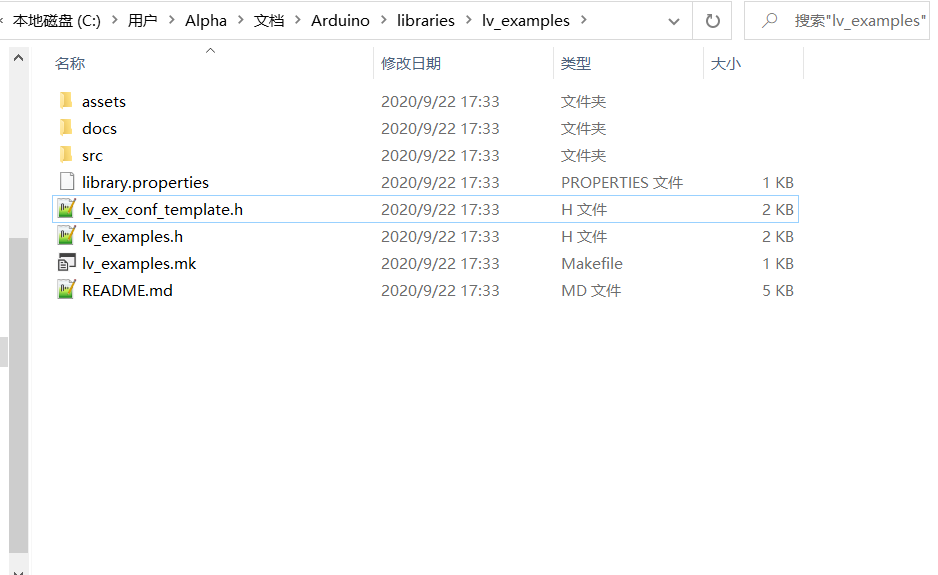
最终效果如下图

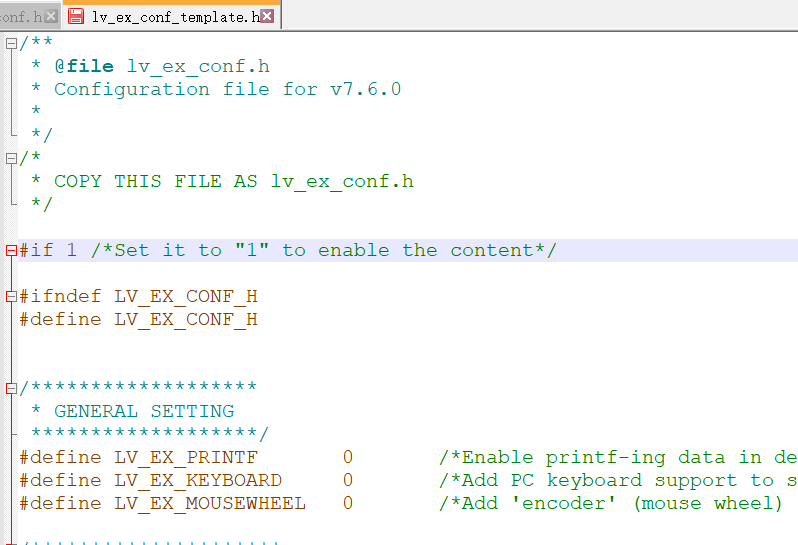
修改 lv_ex_conf.h 中内容,将#if 0 改为 #if 1
根据官方文档,找到LVGL_Arduino.ino,打开这个工程
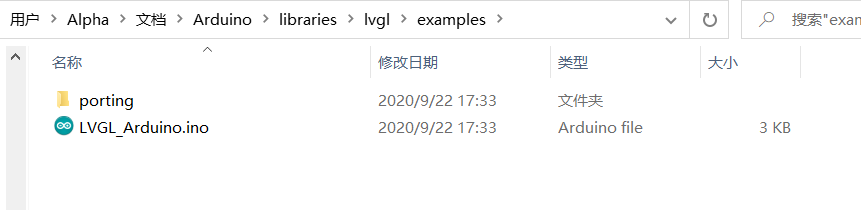
打开工程后,提示建立同名文件夹,建立后重启arduino就可以看到lvgl的示例了
示例工程LVGL_Arduino.ino中也有包含触摸屏的部分,本文用不到,就将其删去
注意要加入#include <lv_examples.h>,不然示例程序会报错,示例程序是以函数的形式出现的lv_ex_btn_1();
还有最后的loop中
1 | void loop() |
原本是这样的,但是参考一些博客后,按照上面代码方式改,可以保证lvgl的获得的执行时间是准确的,理论上lv_tick_inc()执行的间隔实践会决定LVGL刷屏的最大帧率
1 | void loop() |
下面是工程的所有代码
1 |
|